|
|
Paul's
Weather Satellite and Waffle Page |
|||||||||
|
|
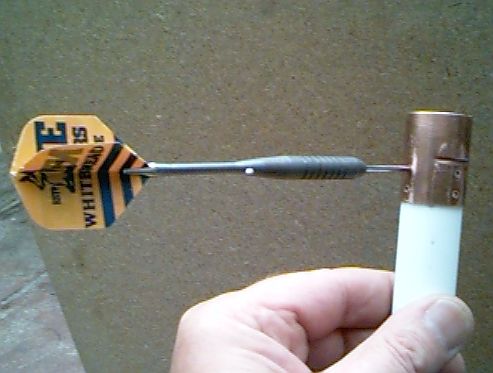
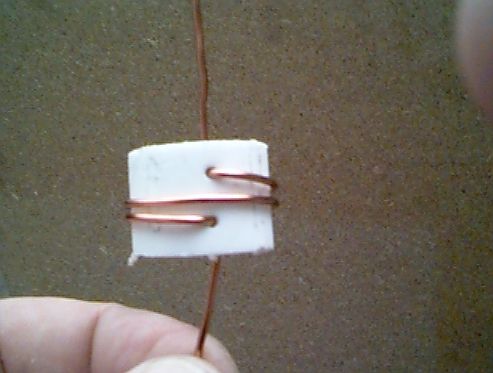
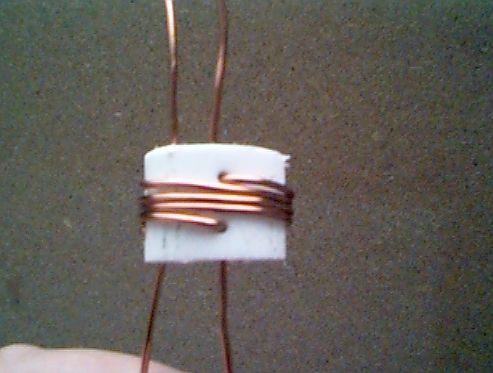
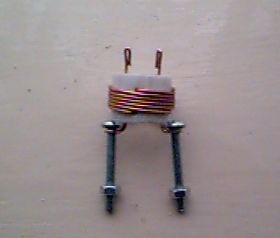
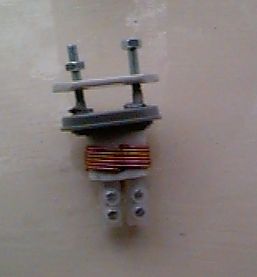
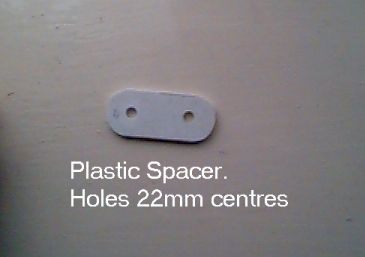
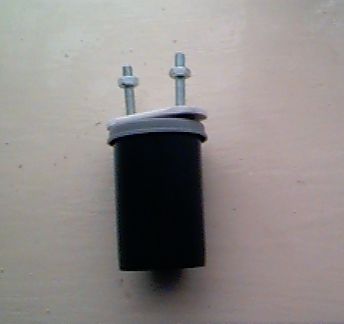
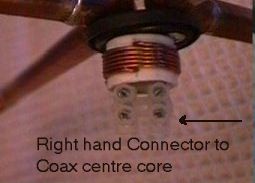
Trifilar Balun Trifilar Balun Warning: If you intend not to use a preamp then beware that the QFH will be a dead short, if your receiver outputs 12volts DC then you may need to disable the 12 volt output either via switch or some other means. If you acquired the RIG journal 53 then you probably don't need to see this chapter. Please refer to photo's when prompted, it will make the explanations a lot easier. Start with a piece of 22mm plastic overflow pipe {FIG 1B} can't you tell I was in the pub darts team Because I am making quite a few I made a jig to assist in making the holes in the plastic former. The plastic Former should be 18mm long, but leave it longer for now, mark in from the edge 5mm then make a hole big enough to take the 18 SWG (1.25mm)wire then imagine a line going accross the diameter (180 degrees) now make another mark still 5mm in from edge, now come back towards your first mark by 2mm then make a hole for the wire, now make another mark half way between the two. {FIG 2B} Then measure 12.5 mm from the same edge and make a hole directly in line with your first hole this should give you a gap of 7.5mm between holes, then repeat with the last two holes. You should now have three pairs of holes. Now starting from the top left hole feed some wire through the hole leaving about 25mm protruding out through the tube, then start wrapping the wire round the former going from left to right, bring the wire 360 degrees then go another full turn 720 degrees total so that the winding finishes at the hole oposite the one you started from, {FIG 3B} cut the wire so that after you have fed the wire through the former you have about 25mm sticking through. Feed some more wire through the next hole to you right, this will be the centre winding, now wind it around again going anti-clockwise like the first winding, take this round twice (720 degrees) cut it and feed through hole, {FIG 4B} Now the last winding {FIG 5B} Scrape off all the enamel from the ends that come through the former. Looking at the balun as {FIG 6B} bend the bottom centre winding up through former and make good connection to top right wire. Now bend the other centre winding down through the former and make good connection to left wire. cut the wires to length and connect the bolts {FIG 7B} tighten the nuts, tin the ends. Fit the Connecting block, the right hand screw terminal connects to the single wire, {FIG 8B} Fit the 35mm canister top, {FIG 9B} then seal with compound, fit the plastic spacer {FIG 10B} Note make sure your windings are close together (a tip from Bob Thorpe) use super glue, you can also wrap some self amalgamating tape around windings. Then finally fit the bottom canister {FIG 11B} All you need to do now is fit it to your QFH, remember when connecting your coax to fit the coax centre core to the right hand connecting terminal {FIG 12B} I think this page is now finished please let me know if you see anything wrong.
| |||||||||
